Before entering Kiyomizu-dera
Confirm that you installed the official demo for your platform. Verified availability covers PS5, Xbox Series X|S, and Windows PC. Reserve more than the official approximate 30 minutes if you want to read every prompt and practice rather than move directly through the early-story slice. The estimate is flexible, and retries can extend an individual session.
Use the controls displayed by the current build. This guide intentionally does not assign button labels because layout, platform, and player settings can differ. If the demo offers options relevant to readability or control, examine them in the interface instead of assuming a universal setup. No specific option inventory is claimed here without direct evidence.
Set a learning objective before moving forward. A useful first-run objective is simply to recognize the difference between Parry, Deflect, and Issen. This keeps the walkthrough useful even though it does not invent a room-by-room collectible route or unsupported item map.
Use early enemies for observation
At the first safe opportunity, watch one enemy long enough to identify a readable attack cue. Notice the motion before the strike, then use the least risky defense available while learning the rhythm. The goal is not to establish a precise frame window from casual observation; it is to build a reliable relationship between a visible cue and your response.
Once the cue is recognizable, test Parry according to the on-screen instruction. Observe what a successful Parry changes and whether it creates an opportunity to answer. Do not add a memorized attack string that this guide cannot verify. A short, deliberate response is enough to show whether you understood the opening.
If an attempt fails, change one variable. React a little earlier or later, but keep the target attack and chosen technique the same. This turns each exchange into evidence. Randomly switching every action may eventually work, but it teaches less about the combat system.
Compare Deflect, stamina, and openings
After gaining a basic feel for Parry, practice Deflect against a cue you can identify. Official hands-on material associates Deflect with pressure on enemy stamina, so watch the stamina state rather than judging only by animation. This lets you see why the technique is not merely another name for Parry.
When pressure creates a clear opening, the combat system includes Issen Break as a named way to exploit that state. Follow the demo's live explanation and observe the result. The source set does not provide a universal number of Deflects required, a complete enemy table, or exact break thresholds, so this walkthrough does not fabricate one.
Connect defense to offense only after reading the exchange. If the opponent is still active, remain prepared rather than assuming every visual response guarantees safety. If an opening is clear, act decisively and then reassess. This habit is more transferable than a fixed sequence tied to one unnamed enemy.
Practice Issen without chasing a fake formula
Issen is a verified high-value counter built around precise timing. Choose one attack you already understand and use it as the practice target. Attempting Issen against every unfamiliar motion at once makes it difficult to tell whether failure came from timing, recognition, spacing, or the chosen response.
Observe the difference between an Issen success and the earlier defensive outcomes. The purpose is to learn the risk-and-reward identity of the mechanic, not publish an exact timing window. The cited official sources do not provide frame data, damage multipliers, or a complete compatibility list for enemy attacks. Any guide that supplies those values without measured evidence would overstate what is known.
If repeated Issen attempts stop being informative, return to Parry or Deflect and continue the route. A beginner does not need to force every advanced success before reaching Ganryu. The demo can be replayed later with Issen as the sole learning objective.
Absorb souls and test Oni Armament
Defeated Genma can leave souls for Musashi's Oni Gauntlet to absorb. Watch for the game's feedback and collect when the immediate exchange is controlled. The souls are tied to supernatural power, and official demo coverage names Oni Armament as a combat use. This is the point to connect enemy defeat with the resource loop.
Use Oni Armament deliberately at a moment when you can see its effect. Avoid claiming a best target, exact damage value, or optimal resource threshold because the source set does not supply those numbers. A successful practice result is simply understanding how absorption changes availability and when you chose to spend it.
Do not let resource collection erase defensive awareness. Secure space before focusing on a soul. That is practical tactical guidance rather than a statement about hidden pickup properties. The demo's value is that it lets you repeat this loop in a contained early setting.
Approach Sasaki Ganryu as a skills check
Sasaki Ganryu is the confirmed encounter at the end of the demo. Enter with the same observation process used earlier. On an initial attempt, identify one attack cue and choose a response. On a later exchange, look at stamina pressure after Deflect. Use Issen only against a cue you can evaluate, and bring Oni Armament into the plan when its resource is available and the moment is readable.
This spoiler-light walkthrough does not invent phases, move names, weaknesses, health values, or a guaranteed rotation. Those details are not present in the verified sources. If an attempt ends, note which cue or resource decision was unclear, then retry with one explicit adjustment. Beating the encounter is the endpoint; understanding why an exchange worked is the transferable reward.
After completion, remember the save rules. Story progress does not carry into the September 4 full release, so expect to begin again. Keep the demo save because it unlocks the Kubi Akari charm. No cross-platform recognition is promised, so preserve it on the account and platform where you expect to play and follow current launch guidance.
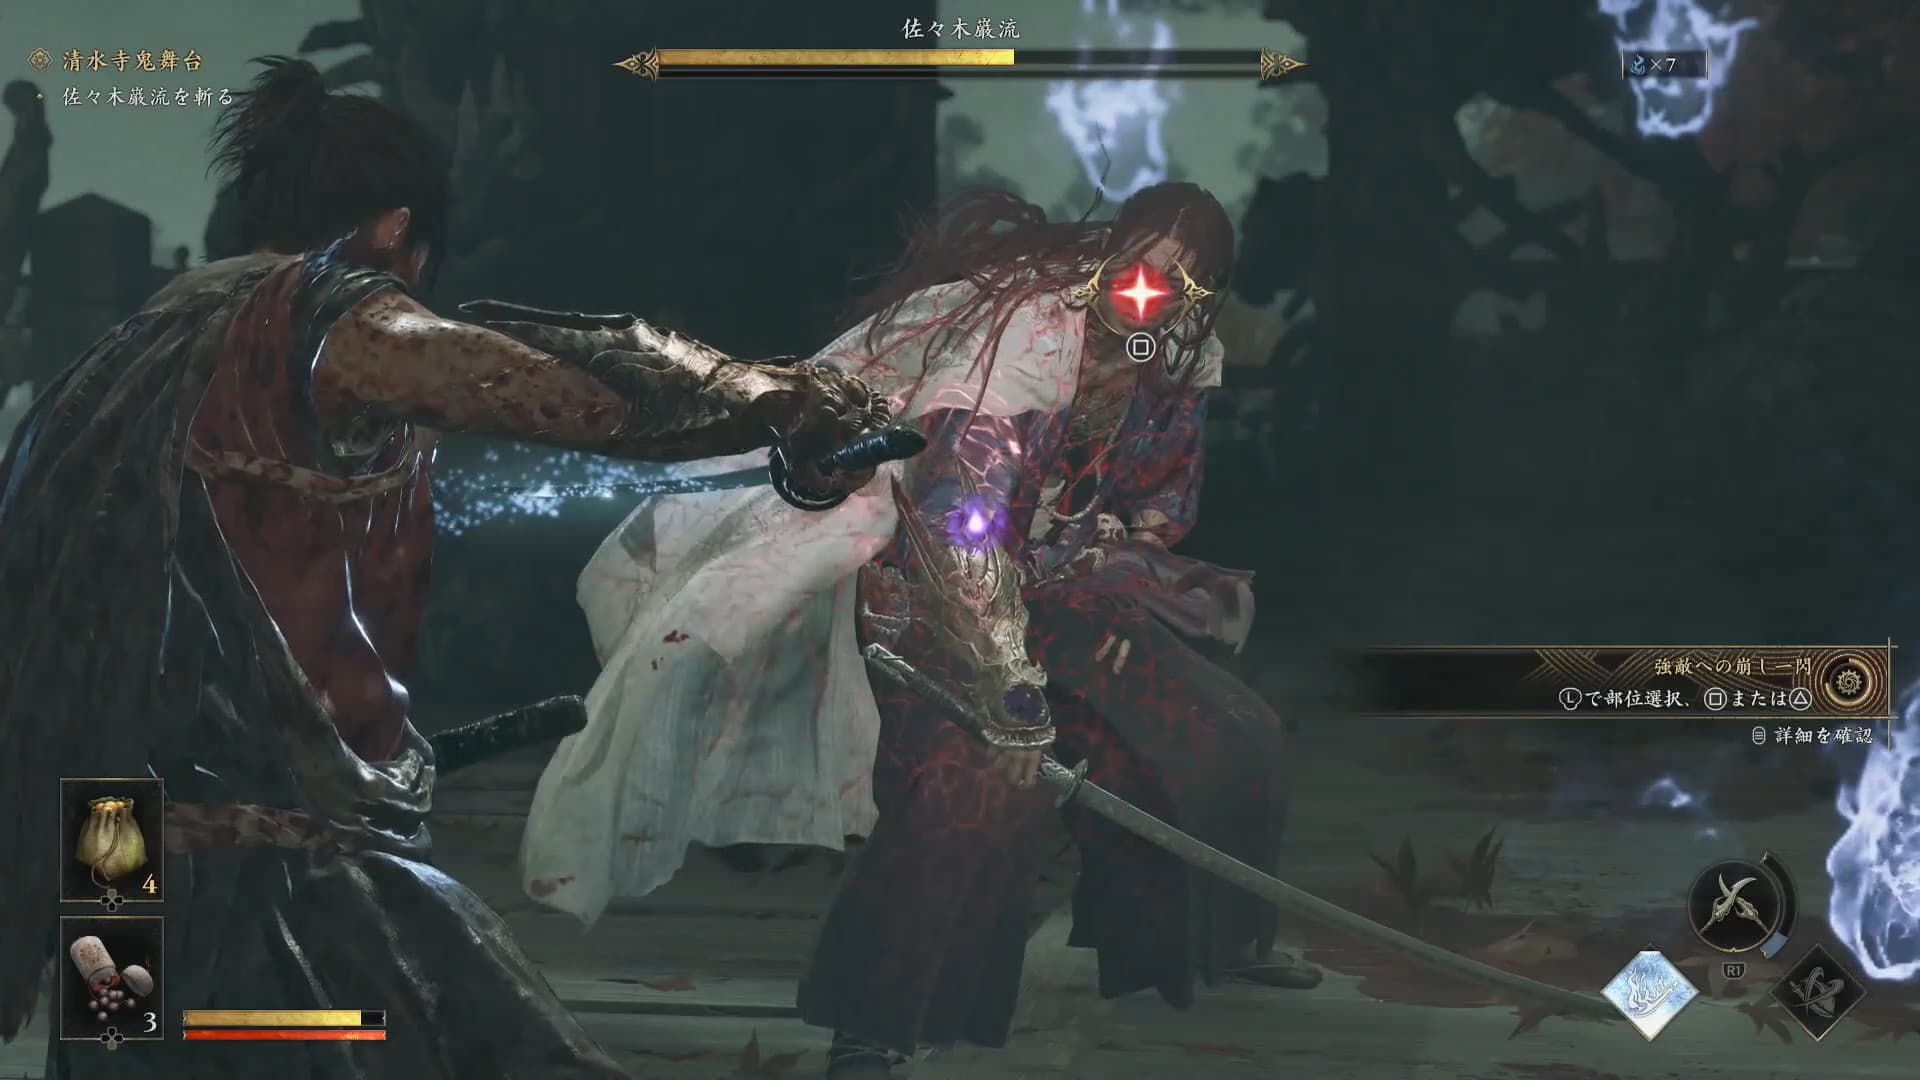 Demo boss spoiler
This page distinguishes verified facts from details that Capcom has not yet announced. Source checks are dated so launch information can be reviewed when official listings change.